A Few Quick Pieces Of Advice
Before we get stuck into the nitty-gritty details, here are a few quick tips and pieces of advice that I wish I had known before we began …
The van will take over your life – If, like us, you are completely new to the world of converting campervans or even using tools, then doing this conversion will take up your whole life. You will spend many evenings and nights trying to work out how to solve a problem, and panicking that you’ve done something wrong. This is normal, don’t worry.
Everything can be learned online – YouTube has videos on how to carry out any stage of a campervan conversion.
You will need some professional help – Installing electrics & gas is best done by a qualified professional. Not least for insurance purposes.
Plan, plan, PLAN! – Watch, read and learn as much as possible before beginning the build and then create a very detailed plan for your desired van. Many things will be worked out along the way, but the more in-depth your plan to begin with, the easier your build will be.
Order as much as possible now, and store it at home – Waiting for parts to arrive from suppliers is the biggest cause of delays on a DIY camper conversion. sometimes we waited weeks for items that we thought would take just a few days & it can put a complete halt to your build.
Finding the perfect base vehicle for your camper van is the first step. We do recommend getting in contact with van dealerships for ex-fleet vehicles. The nice thing about an ex-fleet van is that it is usually had very regular services and been driven rather sensibly, so this way you can be sure the vehicle you are about to spend hundreds of hours converting will be reliable!
A Few Tips When Buying Your Van
When viewing any vans, take someone with you who knows exactly what to look for in terms of mechanical problems
Be ready to buy when a good van pops up
Check if the sale price includes VAT or not (this can mean an extra 20% on top of the list price)
Consider buying a part-converted camper (this may already have some expensive & time-consuming things done, like insulation)
Take any potential vans for a proper test drive prior to purchase
Ask to see a full-service history and find out when the last MOT was.
Design Your Layout
The biggest reason for converting our campervan was that it allowed us to create something entirely custom and based around our needs.
Here’s a few crucial things we wanted when building our van:
A fixed bed – We hate putting a bed up and down every day
An oven
All of the controls (mainly heating) to be accessible from the bed
A shower
A second double bed, so friends could come and stay with us
A large sink and draining board
The largest possible rooflight above the bed
A garage area
A full off-grid electrical system – More on this later
I recommend you make your own list as well, as this makes planning it so much easier.
Buy As Much Equipment As Possible!
Now the first thing I would do is take 2 days to order absolutely everything I could possibly think of and then find somewhere to store it.
I’m talking everything right through from tools, to major appliances, to wood, to tiny details such as nails, screws and adhesives.
Of course, there will always be more things to buy, especially if you’ve never converted a van before; but having as much as possible to start with will make the whole build faster and less stressful.
We did spend half a day ordering and collecting tools before we started and this was one of the best decisions we made.
Where To Buy Equipment For Your Van Conversion:
Local builders merchants – For all wood
online shop(they sell camping supplies)
–https://www.peakoffroad.com.au/
– https://www.drifta.com.au/
–https://more4x4.com.au/
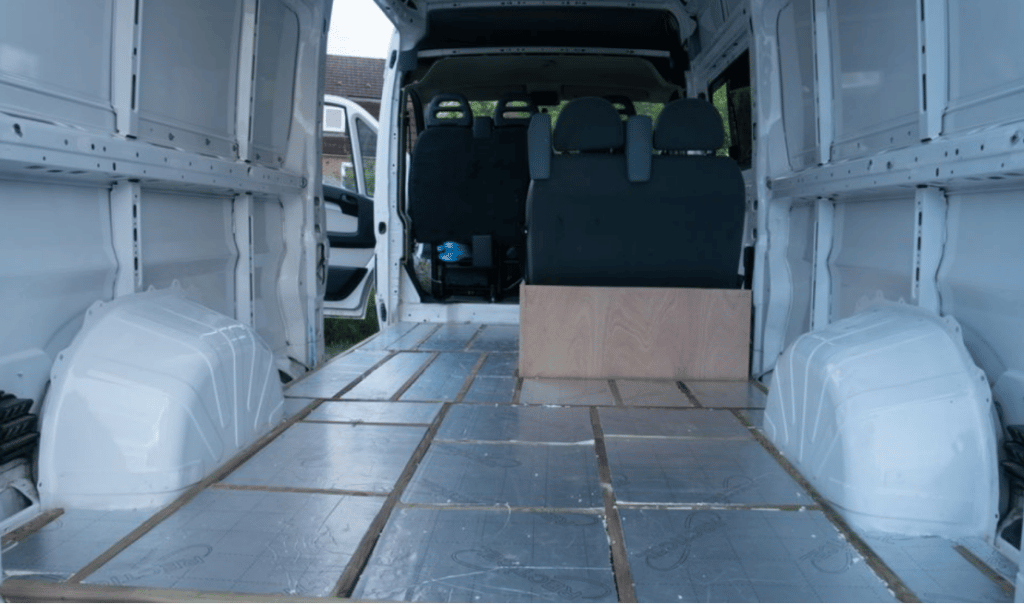
Cut Holes In Your Van
The first stage of converting your van into a camper van is to cut some big old holes in it!
-A sliding side window
-Two porthole windows in the back doors (check out this video of us installing our porthole windows)
-A Maxxair MaxxFan Deluxe in the roof
-A Midi Heki rooflight above the bed
-It’s best to buy these items immediately as delivery times can be a few weeks, depending on stock.
But they do need to be in straight away as they affect the exact placement of everything else inside your van & would be a nightmare to install at a later stage.
The fact that your first main job includes cutting holes into your precious van can be daunting; I know it was for us!
My only advice would be to take it slow and easy.
Oh yeah, and maybe practice by cutting some wood first!
We used a jigsaw for all of the cuts in our van and they all went smoothly.
It definitely helped that we built a set of drawers for my room prior to beginning the van build, so I had a couple days worth of experience using the jigsaw.
Here are some other tips when cutting into your van:
Put masking tape down when making the cut – This protects the vans paintwork from getting scratched.
Wear ear defenders – It is very loud!
Cover your eyes and any exposed skin – Shards of metal kicking back can cause some real damage.
Only cut on a dry clear day – Whatever you are putting in will need time to dry, so don’t install just before it’s likely to rain.
Triple-check your markings prior to cutting
If you’re nervous, then ask someone else to do it – You really don’t want to mess this stage up.
Lay The Floor
You basically want to lay Celotex insulation boards on the floor and then cover them in plywood.
There is some discussion as to whether or not to include wooden battens between the sheets in order to break them up and add some more support to the plywood above.
Many people don’t do this at all, and simply put down the Celotex and then ply straight on top.
For us, parts of the floor were very dinked up as the van had been used for hauling around heavy equipment.
So the approach we took allowed us to properly level it out, but ultimately it’s up to you.
If you buy a van that is new, then you can even save time and effort by laying the existing plywood flooring straight down back on top of the Celotex.
Be sure to lay your flooring as early as possible and then build everything else on top of this; this proved to be the best way to go.
Fitting the vinyl around the finished cabinets/bed/shower would have been a true nightmare and would have looked awful.
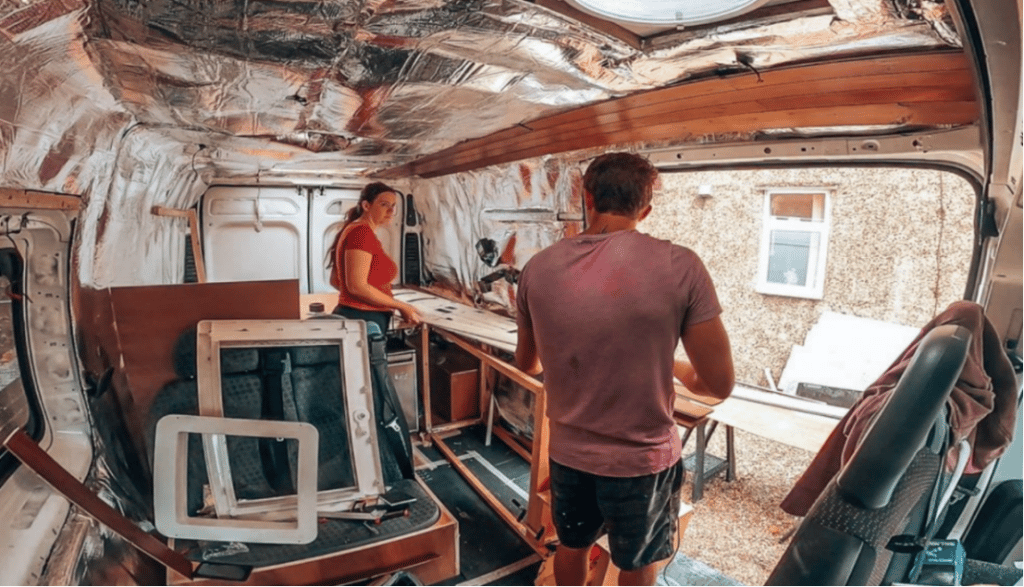
Build The Frame
At this stage of turning a van into a camper, what you are doing is laying the structural foundation for everything else you build onto the walls.
It helps for you to have an exact idea of where everything in your van will be; namely:
- Cupboards
- Bed
- Work surfaces
- Lights
- Controls/switches
Install Electrics
Before you go any further, it’s now time to get your electrical setup installed. For this, you need 2 things:
- A qualified auto electrician who knows what the hell they are doing
- All of the electrical components you want to install and a diagram of where they will be
For a few reasons, I highly recommend you find a qualified auto electrician to fit all of your electrics.
Why?
- It is the safest possible option
- It may invalidate your insurance if you have a fire in the van and it’s caused by your dodgy electrics
- It will save you a lot of time
- The finished product will be far better
If you want a simple and cost-effective way of having an electric system in your camper, then I would really recommend the handE-1000 Solar Generator and was blown away by how powerful and easy it is to use. It includes:
- 1158Wh power station
- 11 charge ports
- 150W solar panel
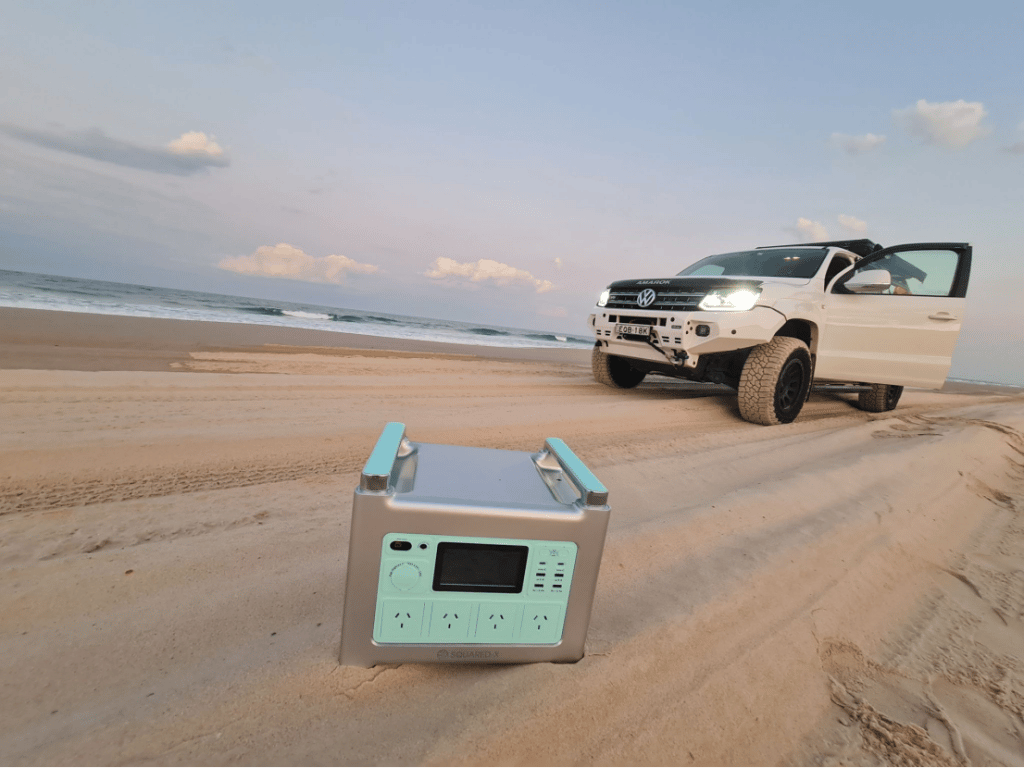
The 1158Wh we reviewed has 11 different charging ports, ranging from standard household AC units to USB ports.
And when it comes to charging them up, you can either do so through standard shore power, via solar power or via your car’s outlet while driving.
What this means is you can have a straightforward power solution for your van, up and running in very little time at all.
Allowing you to power all the devices you need, without needing to spend thousands on all the components listed above and in our electric guide.
Don’t get me wrong, I love the onboard system, and would highly recommend it to anyone looking to live full-time in a van. But if your budget is limited, and you want a quicker electric system, you could consider opting for a portable power station.
Find your closest dealer in the link below:
https://squared-x.com
Insulate Your Campervan Conversion
This is a crucial part of your van build; regardless of where you plan on traveling to in your van.
A well-insulated van allows you to stay warm in cold climates, and also cooler in hot climates.
The insulation we went for was recycled plastic loft insulation from B&Q.
This is one of the few products I recommend you buy from B&Q, as they are normally much more expensive than elsewhere.
However, in this case, they work out much cheaper and it turns out that loads of people use the same stuff for their vans.
For parts where it falls or comes loose, use a spray-on contact adhesive to glue them down.
We did exactly this for the roof and it holds it well; especially once you add on the next part of the insulation … Thermo Van Liner
This stuff is really cool and acts, not only as additional insulation but also as a vapor barrier; which allows everything to stay nice and dry despite condensation.
It also creates a nice flat finish across all parts of the van and helps to hold in any wayward plastic insulation.
For any awkward to insulate parts of your van, you can use spray foam insulation; it is good stuff once you get the hang of it.
Sound Deadening
Before we move on, it’s worth mentioning sound deadening, which is something we fitted below the insulation and against the panels of the van.
The idea behind this stuff is that it sticks straight onto larger pieces of sheet metal which would otherwise rattle and make noise when you drive along.
We ordered a pack of this stuff here from Peak Off-road Equipment and stuck it against the panels and definitely made a difference when driving, before fitting all of the insulation.
It’s hard for us to now say how much of a difference it makes in the long run, once you’ve fitted cladding and whatnot; but it certainly doesn’t harm to have it there.
Clad The Walls
You have two approaches here:
1, Paint/varnish the cladding beforehand and then fit
2, Fit the cladding first and then paint
We took approach number 1 for the roof and approach number 2 for the walls.
Build The Structures
Here’s where the build gets exciting because it’s time to start building the things you will actually use in your DIY campervan conversion!
Kitchen – with a sink, space for oven, and cupboards
Shower
Clothes cupboards x 2
Space for the fridge
A floating bed
Garage area
A second guest double bed
Create A Water System
Here’s the basic gist of how our campervan water system works:
70 litre water tank stores all of our fresh water & can be filled by hose through filling point in rear of van
Water is pumped out of this using a 30PSI Shurflo water pump (runs on 12v)
This pumps water out of the tank, through an accumulator and then “T”’s off to our water heater and onto the front of the van
The water heater has a hot outlet that runs parallel to the cold feet through to the front of the van, all underneath the bed
Each feed then has a “Y” connector which goes either on towards the shower or onto the sink
If you need to run water through the system, then you simply turn on the water pump using a switch that is wired above the sink
To heat water, you just flick the switch that is also above the sink (takes 10-20 minutes depending on whether you heat with gas, electric or both)
All hose is ½ inch (12mm) food grade and bought from this shop here: red / blue
To hold the hose onto fittings, they are all secured with jubilee clips (hose clips)
We have an underslung waste water tank, that is filled with 3/4inch waste pipe coming from the sink and shower.
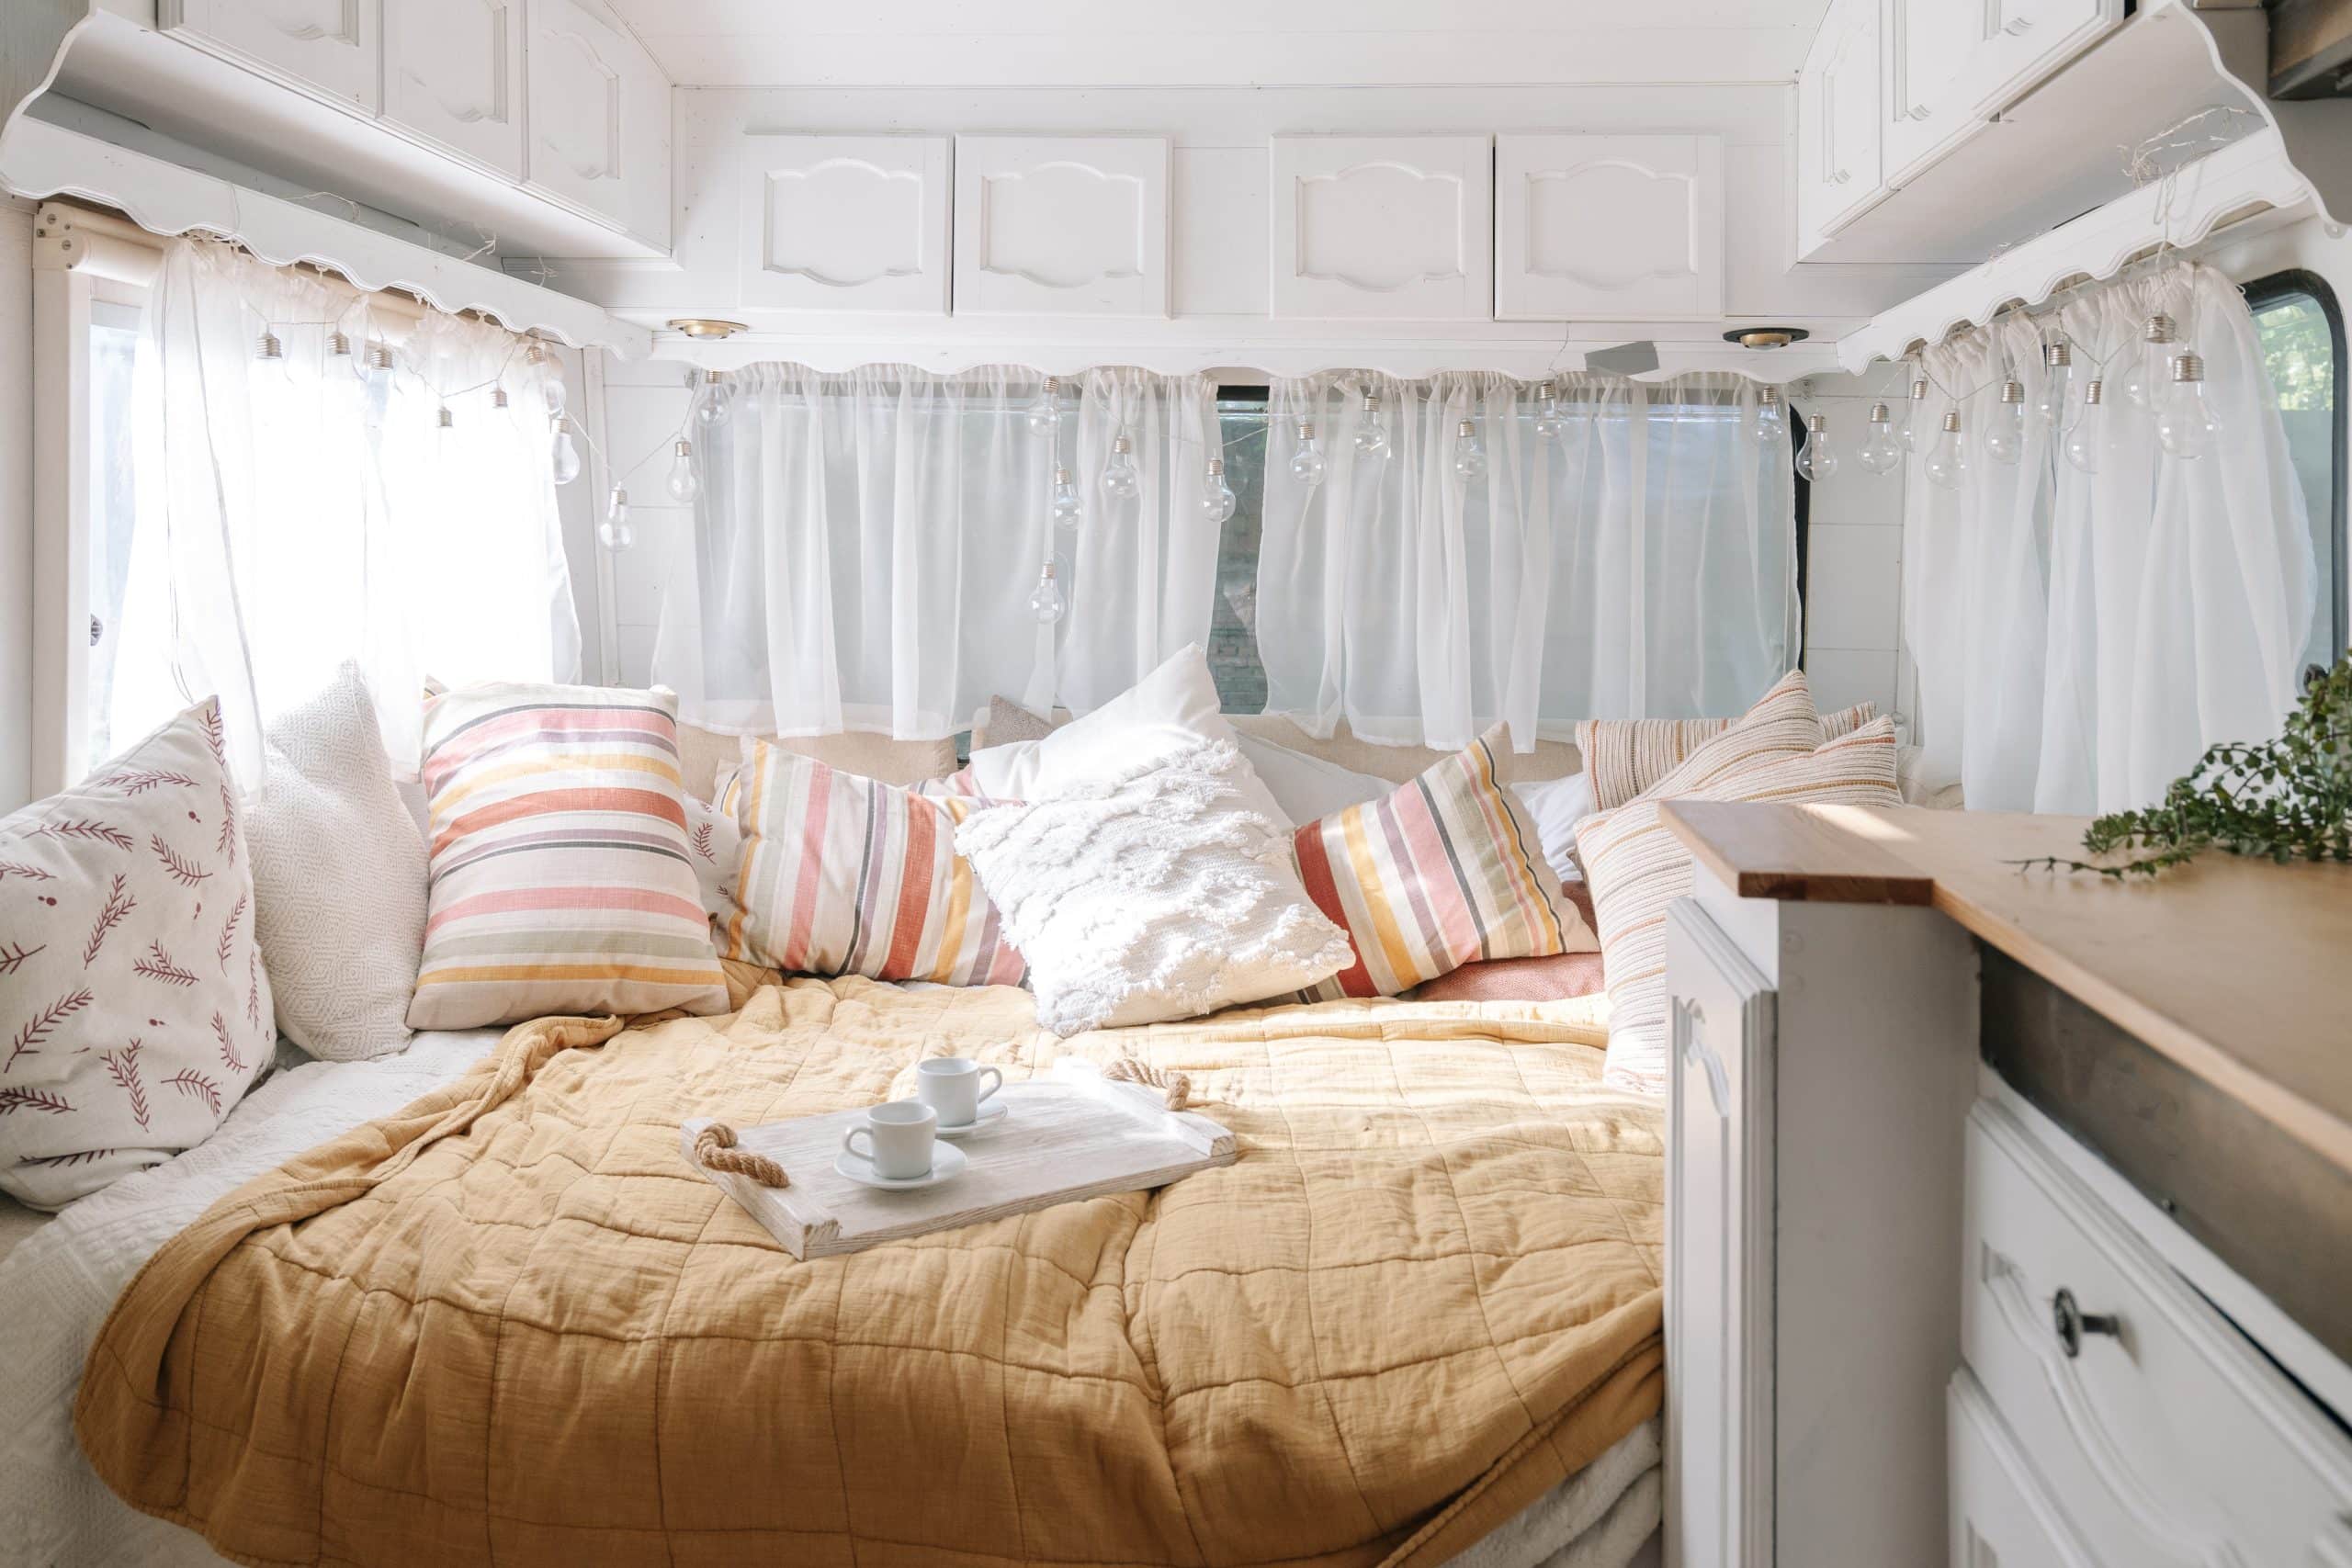
Add The Finishing Touches

Once you get this far it should just be a case of putting in some finishing touches to make your van more homely.
This is entirely personal and up to the finished look you want to achieve;
Well, that’s about it! If you read that whole thing, then congrats; it ended up being pretty epic.